Picture this: you’ve just finished painting your home’s exterior, and within months, the paint starts peeling, bubbling, or fading. Sound familiar? The truth is, 90% of painting failures stem from poor surface preparation, not the paint itself. At Honest Brothers Painting, we’ve seen countless homeowners skip the prep work only to face costly do-overs later.
Whether you’re tackling your first DIY exterior painting project or you’re a seasoned homeowner looking to refresh your knowledge, proper wall preparation is the foundation of any long-lasting paint job. The good news? With the right approach and these seven proven steps, you can achieve professional-quality results that stand the test of time.
Why Proper Wall Preparation Makes All the Difference
Before diving into the steps, let’s address the elephant in the room: why does preparation matter so much? Industry expert insights reveal that “preparation is the single most important aspect of any decorating project.” Without properly preparing a surface to be painted, you risk achieving a below-par finish or even worse—paint that doesn’t properly adhere to the surface.
Think of wall preparation like building a house. You wouldn’t construct a home on unstable ground, would you? The same principle applies to painting. Your exterior walls need a clean, smooth, and stable foundation for paint to bond effectively.
Key benefits of proper preparation include:
- Extended paint life by several years
- Better paint adhesion and coverage
- Professional-looking finish
- Cost savings from fewer repaints
- Protection against weather damage
The 7 Essential Steps to Professional Wall Preparation
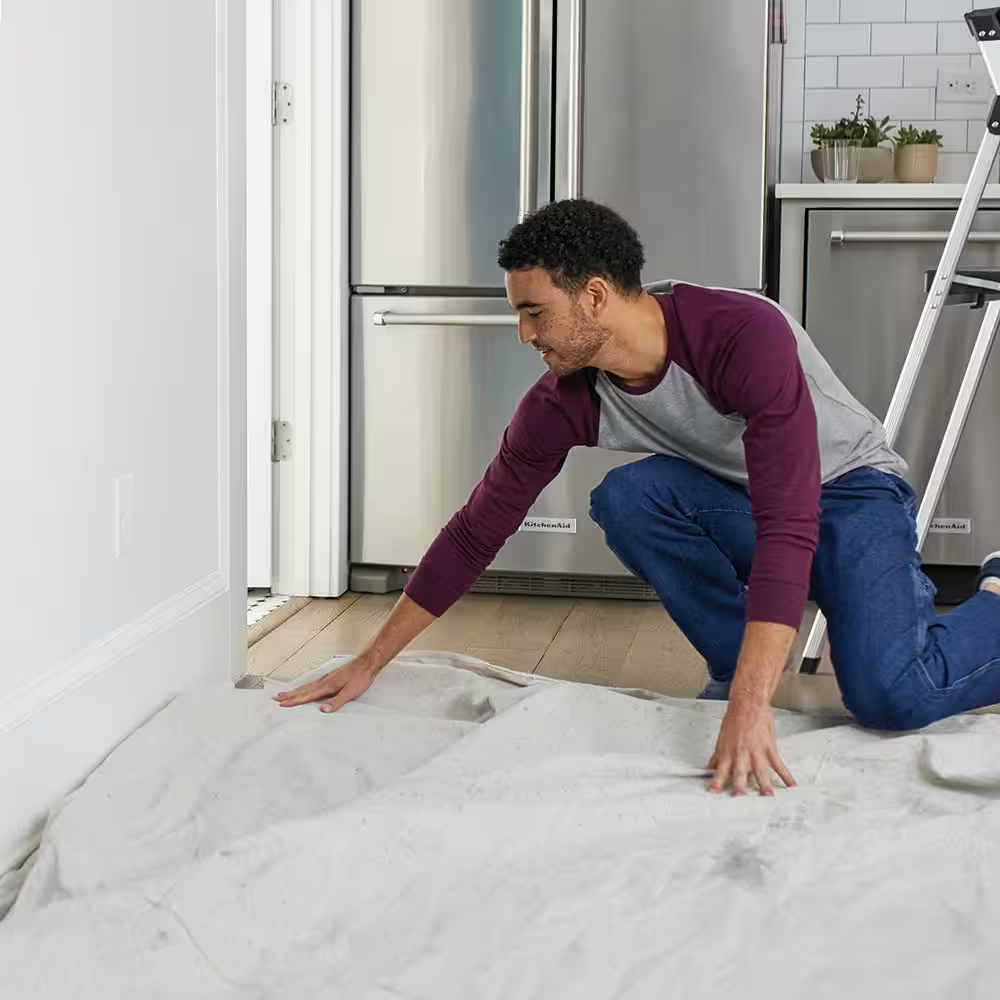
Step 1: Protect Your Surrounding Areas
Start by creating a clean, safe workspace. This step might seem obvious, but it’s often rushed, leading to damaged property and messy cleanup later.
What you need to do:
- Remove or relocate patio furniture, grills, and trash bins away from the house wall
- Cover outlet boxes, fixtures, windows, and doors with painter’s tape and drop cloths
- Trim back trees and shrubs that touch the house
- Protect landscaping with drop cloths to prevent paint splatter on plants
Pro tip: Use high-quality painter’s tape that won’t leave residue. Cheap tape might save you a few dollars upfront but can cost you hours of cleanup later.
Ready to get started but feeling overwhelmed? Contact us for a consultation on your exterior painting project.
Step 2: Clean the Surface Thoroughly
A clean surface is crucial for paint adhesion. Dirt, mildew, and other contaminants create a barrier between your paint and the wall, leading to premature failure.
Your cleaning options:
- Power washing: Use a pressure washer, working from top to bottom with overlapping strokes
- Hand washing: For delicate surfaces, use a hose and scrub brush with detergent
Special considerations:
- For homes with mildew, mix one part chlorine bleach with three parts water, or use a commercial mildewcide
- Softwood siding warning: Avoid power washing redwood or cedar siding, as it can cause damage. Instead, hand-scrub with detergent and water
- Always rinse thoroughly and allow 24-48 hours for complete drying
Step 3: Repair All Damaged Areas
Walk around your home and inspect every surface carefully. Look for holes, cracks, and damaged areas in wood, masonry, siding, or stucco. These imperfections won’t magically disappear under paint—they’ll only become more noticeable.
Repair process:
- Use high-quality exterior-grade fillers for gaps and holes
- For rendered walls, tap the surface to check for delamination (a hollow sound indicates repair is needed)
- Rake out loose debris before applying filler
- Allow proper drying time before moving to the next step
Critical insight: Don’t skimp on filler quality. Cheap fillers often shrink, crack, or fall out within the first year, forcing you to start over.
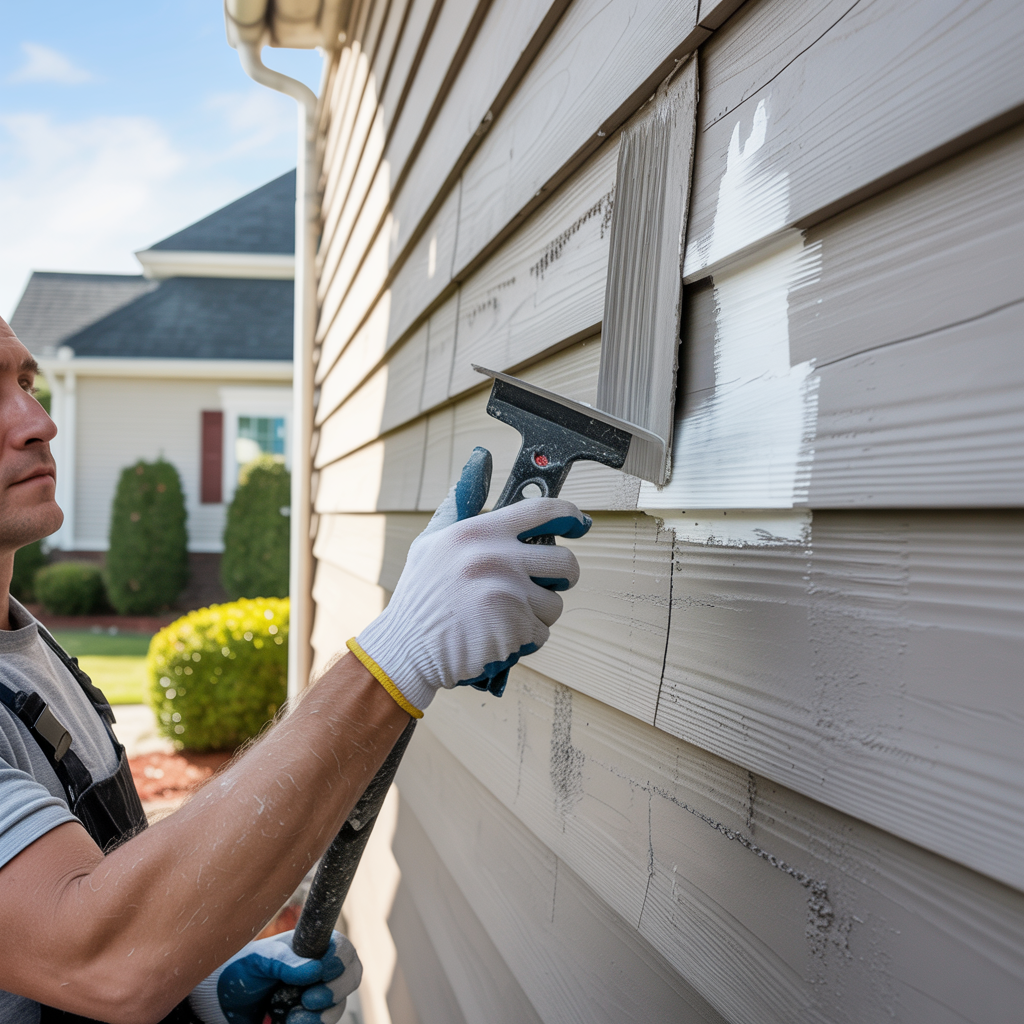
Step 4: Remove Loose and Peeling Paint
Here’s where many DIYers make a crucial mistake: they think they need to remove all old paint. The truth is, you only need to remove problematic paint—anything that’s peeling, chipping, or flaking.
Effective removal techniques:
- Use a paint scraper, putty knife, or oscillating tool with a rigid scraper blade
- Apply even pressure to avoid gouging the surface
- Focus on areas where paint has lost adhesion
Important safety note: If your home was built before 1978, you must test for lead paint first. Approximately 24 million housing units still contain deteriorated lead paint, and disturbing it without proper precautions poses serious health risks. When in doubt, hire a certified lead inspector.
Step 5: Sand for Smooth Adhesion
Sanding creates the mechanical bond your new paint needs. This step is often overlooked by DIYers, but it’s what separates amateur jobs from professional results.
Sanding guidelines:
- Use 180-grit sandpaper for water-based paints
- Medium-grit works better for oil-based paints
- Electric sanders speed up the process for large areas
- Sanding blocks provide precision for detailed work
Time-saving tip: You don’t need to sand every square inch. Focus on glossy surfaces, rough areas, and spots where you’ve made repairs.
Looking for expert exterior painting services that handle all the prep work for you? We’ve got the experience and tools to get it done right the first time.
Step 6: Prime for Perfect Paint Adhesion
Primer isn’t optional—it’s insurance for your paint job. Many homeowners skip this step to save time or money, but primer serves critical functions that paint alone cannot.
When you absolutely need primer:
- Bare wood or new surfaces
- Significant color changes (especially going from dark to light)
- Previously unpainted surfaces
- Areas with stains or discoloration
Application tips:
- Use a masonry brush or long-pile roller for best coverage
- Coverage typically ranges from 5-8 square meters per liter, depending on surface porosity
- For mixed surfaces (some bare, some painted), spot prime only the bare areas
Step 7: Check Weather Conditions
Timing is everything in exterior painting. Even perfect preparation can fail if you paint in the wrong conditions.
Ideal painting weather:
- Temperatures between 50°F and 85°F
- Low humidity (below 70%)
- No rain in the forecast for at least 24 hours
- Light to no wind
Strategic timing:
- Paint west-facing sides in the morning
- Paint east-facing sides in the afternoon
- This approach helps you avoid direct sunlight, which can cause paint to dry too quickly and affect adhesion
Planning tip: Block out a full month during your area’s dry season. This gives you flexibility to work around unexpected weather changes.
Common Preparation Mistakes That Cost You Money
Rushing the Cleaning Process
The most expensive shortcut you can take is inadequate surface cleaning. Paint won’t adhere to dirt, and that beautiful new coat will start failing within months. We’ve seen homeowners spend thousands on premium paint only to watch it peel off because they skipped proper cleaning.
Ignoring Small Repairs
Those tiny cracks and holes seem insignificant now, but they become major problems under paint. Water intrusion through these openings can cause extensive damage to your home’s structure, leading to repair bills that dwarf the cost of proper preparation.
Using the Wrong Tools
Quality tools make quality work possible. Cheap brushes leave streaks, inferior scrapers gouge surfaces, and low-grade sandpaper clogs quickly. Invest in proper tools—they’ll save you time and deliver better results.
When to Call in Professional Help
Some situations require professional expertise:
- Lead paint presence in pre-1978 homes
- Extensive damage requiring structural repairs
- Multi-story homes requiring specialized equipment
- Time constraints that don’t allow for proper preparation
As painting professionals, we’ve learned that proper preparation isn’t just about technique—it’s about patience and attention to detail. Brooke Cambridge, owner of BLC Painting, puts it perfectly: “If you put sufficient effort into preparing for a paint job, the work your client often doesn’t see will pay dividends with an easier and longer-lasting paint job.”
Advanced Tips for Superior Results
Creating Texture for Better Adhesion
For smooth surfaces that have been previously painted, consider light sanding or using a bonding primer. These techniques create microscopic grooves that help new paint grab hold more effectively.
Managing Large Projects
Break your project into manageable sections. Complete all seven preparation steps on one side of your house before moving to the next. This approach ensures consistent quality and prevents you from feeling overwhelmed.
Weather Monitoring
Use a weather app with hourly updates rather than daily forecasts. Conditions can change quickly, and getting caught in unexpected rain or humidity spikes can ruin hours of work.
Choosing the Right Materials for Your Climate
Hot, Sunny Climates
UV-resistant primers and paints are essential in areas with intense sun exposure. Look for products specifically formulated for high-heat conditions.
Humid Environments
Mildew-resistant products should be your go-to choice. These formulations contain antimicrobial agents that prevent mold and mildew growth, which is especially important in coastal or humid inland areas.
Cold Climates
Flexible paint formulations handle freeze-thaw cycles better than rigid alternatives. These paints contract and expand with temperature changes without cracking.
Frequently Asked Questions
How long should I wait between prep steps? Allow each step to fully complete before moving to the next. Cleaning requires 24-48 hours of drying time, repairs need time to cure (check manufacturer specifications), and primer typically needs 4-6 hours before painting.
Can I skip primer if I’m using paint with primer included? Paint-and-primer combinations work well over previously painted surfaces in good condition, but they’re not suitable for bare wood, dramatic color changes, or problem surfaces. When in doubt, use separate primer and paint products.
What’s the biggest mistake DIYers make during preparation? Rushing the process. Each step serves a specific purpose, and skipping or hurrying through them almost always leads to problems later. Plan for preparation to take 70% of your total project time.
How do I know if my home has lead paint? Any home built before 1978 should be tested for lead paint before disturbing the surface. You can purchase test kits at hardware stores or hire a certified inspector for comprehensive testing.
What should I do about peeling paint on trim and siding? All loose, peeling paint must be removed before painting. Use a scraper, but be gentle to avoid damaging the underlying surface. Sand lightly after scraping to smooth any rough edges.
Is power washing always necessary? Power washing is the most effective cleaning method for most surfaces, but it’s not always appropriate. Delicate materials like cedar shingles or old caulking might be damaged by high pressure. When in doubt, test in an inconspicuous area first.
Your Path to a Professional Paint Job
Proper exterior wall preparation isn’t glamorous work, but it’s the foundation of every beautiful, long-lasting paint job. By following these seven essential steps, you’re setting yourself up for success and protecting your investment in your home.
Remember, preparation typically takes longer than the actual painting, but this time investment pays dividends in durability and appearance. Take your time, use quality materials, and don’t cut corners on safety—especially when dealing with older homes that might contain lead paint.
The difference between a DIY paint job that lasts two years and one that lasts ten often comes down to these preparation steps. Your future self will thank you for the extra effort you put in today.
At Honest Brothers Painting, we believe that every home deserves the care and attention that comes with proper preparation. Whether you tackle this project yourself or decide to work with professionals, the most important thing is that it’s done right the first time. After all, your home is more than just a structure—it’s where life happens, and it deserves to look its best.